Tuesday, June 18, 2013

Ruby Rock It

Hi Everyone! Today I have a couple of cards to share with you. I've been a layout artist since I ventured into this scrappy world and over the last few months I have developed a new fondness (dare I say love) for cards and tags and other crafty delights that I'll call "smalls" (well, compare to layout size)
"Smalls" are so much fun! Who knew???

Ruby Rock It is teaming up with Clearsnaps this month and I've used smooch spritz on this card in the form of misting and splatters. This month we are featuring our cardmaking products, vellum and bling and I wanted to show here how you can use the Fundamentals embossed card fronts as a layer with a different card as your base. I simply cut the embossed front off the Imprints and layered it over blue cardstock cut to size. 

Keeping with a summer fun theme here I'm thinking lots of barbecues are coming up and July 4th is around the corner. This invite fits the bill for an summer sized party! I've misted my vellum strip that was punched and layered in on the left side of the card. Once again I used the mini theme papers "Baby Boy" So great for a red, white and blue theme!

The Bella Bling doesn't have to be used as you see it in the package. I always like to snip at my bling to make it fit my page or card. Here I used the Red Flourish but turned it on it's side and snipped it apart so it would enhance my greeting.
***************
My next card was so fun to make. 
I used the embossed Flourish card for my base. I used a spellbinders blossom die and cut out a layer from another embossed card front. Under my die cut I layer the Bella pattern paper.

My flower is a Heartfelt Creations stamp and I used embossing powder along with clearsnaps embossing powder in Lemonade. The stamping and embossing were done on vellum. I love to emboss vellum especially with flower stamps!

I simply layered the flower and added a chipboard accent in the center. The bottom of the card was finished off with ribbon and chipboard accents!


Ruby Rock It
Supplies


Tuesday, June 11, 2013

Ruby Rock It

Ruby Rock It
Destination Anywhere

Hi Everyone! 
When I think of summer fun time I think travel,adventure,exploration and relaxation.
I created this layout with an adventure theme in mind using Ruby Rock It's Mini Theme- Travel Range.

I used the Travel Picture Frame paper for the background and cut out a postage stamp edge. I wanted the whole layout to have a "postal" type feel to it.

We have Clearsnaps on board with us this month and I have used the "Splash" smooch as splotches in my background.


I think the notebook edge punch from Fiskars adds to the postal type feel I was going for here. I used it on a background layer and on my photo.


I used a spellbinders die and cut it in half. I added some eyelets and a metal charm with some hemp cord and added it to the top of my photo.


I love to silhouette cut photos. I wanted this photo of my daughter to appear as though she were walking right off that bridge and into the page. "Destination Anywhere"

Thanks for stopping by today. 


Friday, June 7, 2013

Ruby Rock It Blog Hop

Hello
there to you our faithful 
Ruby Rock-it Fans
Welcome to our June blog hop!  
 This month, we are featuring our very versatile Fundamentals cardmaking supplies, gorgeous vellum, and our bling!  And after you hop along, make sure you find out the details on how you can have a chance to win this amazing PRIZE pack!
Come and hop along with us, leaving comments at each blog to enter to win an awesome Ruby Rock-it prize pack!  You could win your very own collection of Ruby goodies!  Here's the order of blogs in case you get lost along the way!
Lisa Novogrodski <

MAKE SURE YOU LEAVE A COMMENT ON EACH DESIGNER’S BLOG AND THEN ON THE RUBY ROCK-IT BLOG ONCE YOU’RE DONE HOPPING ALONG RUBY ROCK-IT  TRAIL!

RUBY ROCK-IT BLOG HOP RULES-LEAVE A COMMENT ON EACH DESIGNER’S BLOG AND THEN ON THE RUBY ROCK-IT'S BLOG TO BE ENTERED TO WIN THE Ruby Rock-it  PRIZE PACK. COMMENTS MUST BE POSTED BY SUNDAY, JUNE 9TH AT 11:59PM PST TO BE ELIGIBLE FOR THE RANDOM DRAWING.  WE WILL ANNOUNCE THE WINNER ON OUR RUBY ROCK-IT BLOG ON TUESDAY, JUNE 12TH!
*************************
This month Ruby Rock It is teaming up with Clearsnaps
and I am sharing two cards I created with Clearsnaps smooch and Fundamentals cardmaking supplies.
I created these cards with a Fathers Day theme in mind. My base is the Fundamentals Imprints white cardstock. I used Clearsnaps smooch in Pink Sprinkle and splattered it across the background.

I love layering and using products in different ways than what they were intended. I used the Bella Narratives in two different patterns and layered them on the card front. Love the black and white theme that was so easy to put together with the with these cardmaking products by RRBF.


My sentiment is from Heartfelt Creations. Under my stamping and die cut I trimmed up a sheet of vellum to fit just inside that Narratives die cut.
*************

My next project features the "B" side of the Bella Mini Theme Papers "Baby Boy and Graduation"
I love how versatile these papers are and how I was able to get a masculine adult style card out of a "baby boy" themed range.


Again I have used Clearsnaps smooch for my background misting and this time the color I chose was "Splash"


My sentiment is another stamp from Heartfelt Creations. I'm loving how the Bella Bling in red and little Card Accents are like candy on this card! I also snuck some vellum in. A strip of punched and misted vellum tucked into the other punched pieces on this card. It lends a special touch here.

Hope you give some of Ruby Rock It's cardmaking supplies a go!

Your next stop is Pamela Young

Supplies


Wednesday, May 22, 2013


This week I'm working with the Eklectique collection from Ruby Rock It and some great Fiskars products who we are teaming up with this month! I've been inspired by the work of Melissa Phillips who is an A*M*A*Z*I*N*G artist and I'll never measure up to her but I keep trying.

I have created some "thank you" tags featuring this range. 

Here I have used Ranger Tags and covered them with a layer of Eklectique mini paper and punched one of the edges with Fiskars Notebook Punch. I used the Fundamentals Vellum and sprayed it in Lindys mist in a shade of brown to give it a vintage look. Then I used one of my dies to create a little bag for the front of the tag. This little bag will hold a treat, gift card, jewelry, candy - a great surprise for someone special.
I cut some of the vintage images off the Eklectique paper and layered it over one of the tags and circle punched with my Fiskars XXL punch. I spray misted the Bella Silver Foil "Thank You" tags in brown to give it a vintage look. No need to use things as they come in the package. Alter them to suit your style, design and the project you are working on.
The top of this tag has a crinkled seam binding bow I created with ivory seam binding that I colored with mist to continue with my vintage theme. 
This is another tag I created with the same theme. I layered a doily, my vintage bag a circle and the photo. My bag holds one of the tags with a button and ribbon for an extra touch.
I topped my tag off with a flower and leaves and some cotton string tied in a bow. 

Take a peek in my etsy. I'll be carrying these tags along with many others. I LOVE making them!

Fiskars


Ruby Rock It
Supplies

Tuesday, May 7, 2013

Ruby Rock It

May Sketch Layout
Fiskars

Hi Everyone! Today I am sharing a layout I created for Ruby Rock It featuring the beautiful sketch for May as my inspiration.  

Ruby Rock It is teaming up with Fiskars this month and I used two of their punches on my project!
This photo is of my Mother in Law back in the day! I've created my layout in honor of the upcoming Mothers Day!


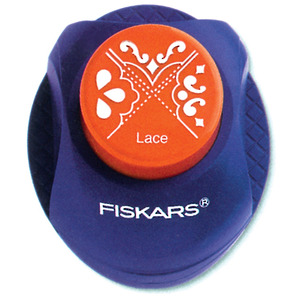
I used the Lace Fiskars Punch on the corner of the Ecklectique Mini Pack Paper.
            
All of my flowers were created with Heartfelt Creations Botanical Floral Stamps and leaves. I used Distress Inks to color the flowers and leaves.
             
Ruby Rock It has some great embossed cardstock selections. I used the Hexagon cardstock here and sanded off some of the design.
          
Fiskars has a wonderful Notebook border punch. I've used purple cardstock and tucked the notebook punched edge into my photo layering.


Supplies


Sunday, May 5, 2013


Hello Ruby Rock-it Fans! 

 Welcome to our May blog hop!

If you have arrived here from 
Liana Suwandi's Blog
You are on the right track!


 We are featuring 
3 ranges that reach our softer side...Arcadia, Mother Nature, and Reminisce.  
These are all so delicate and dainty on their own, and blend just beautifully together!  Come and hop along with us!

Here is what Ruby Rock it is giving away!


In order to be eligible to win the prize you must leave a comment on each designers blog and then go back and leave a comment on the Ruby Rock It blog letting us know how much fun you had!
You will be entered to win an awesome Ruby Rock-it prize pack!  

Comments must be posted by Tuesday May 7th at 11:59 PM PST. A winner will be randomly drawn and announced on the Ruby Rock It Blog Wednesday May 8th!


Today 
am sharing 
>>a gift box and tag <<
in 
celebration of Mothers Day!

Ruby Rock It 
is teaming up with Fiskars this month and I was lucky enough to get some fabulous punches to work with!

Those of you who know me, know I love to alter Laughing Cow cheese boxes. They are truly awesome for so many different projects. Plus I'm saving the environment by recycling them into something beautiful right???

What Mom wouldn't love to receive some jewelry or a gift card packaged inside this box?
click on photo to enlarge

I used the beautiful Reminisce Collection to create this gift box and tag. I covered the box inside and out and distressed the edges.
click on photo to enlarge


I used Reminisce papers to cut out the Vintage Dress Form Die from Cottage Cutz and layered it over the circle I punched with my Fiskars XXXL Lever Punch.


click on photo to enlarge


I used the ruler from some of the packaging in the quilling kit to embellish the front of my box. The packaging is just as beautiful as the product inside it!

I did some distressed punching along the sides of the box.
click on photo to enlarge


The little flower on the tag is a quilled flower I created direct from the quilling kit. I took a Kraft tag and stamped the front and back. I dressed it up with die cuts from the Reminisce die cut pack.
The back of the tag is stamped and is wishing Mom a 
"Happy Mothers Day"

Supplies

Ruby Rock It-
Reminisce- Quilling Kit

Fiskars- Lace Punch


        Your next stop is the Ruby Rock It Blog!

Lisa Novogrodski   <

Wednesday, April 24, 2013

Ruby Rock It


Kinda Krafty

Hi Everyone! Today I am sharing some tags created with the featured product for the month 
"Kinda Krafty"

We are also teaming up with Therm O Web this month!


I created my tags mixed media style, layering paints, modeling paste with masks and Kinda Krafty products. I have used the Therm O Web tape runner to adhere my paper layers.

On my tags I have used the cute chipboard owl, leaves, birds, buttons and even the letter "M" turned on it's side. 
My chipboard is colored with inks to match the theme of my tag! Therm O Web Glue dots were used on all my tags to keep the cute chipboard pieces in place. 


Supplies


© Living in Color