Saturday, December 5, 2015

Welcome To The Frank Garcia Design Team Blog Hop


Today you will have a chance to meet the team get a peek at some of Franks Collections and enjoy the diversity of design teams styles.

Oh and Frank also has a wonderful giveaway so you will want to stop at each blog and leave a lovely comment in order to qualify to win!
Here is a peek at the gorgeous prize!


If you have arrived from Beatriz's Blog you are on the right track. If you have not then go back to the beginning starting at Franks Blog and enjoy!

I created a layout for the hop using the Cartographer Collection. A gorgeous collection well suited to my style and I had fun with it. I also created a step by step process video for you to enjoy.

Cartographer Layout by Lisa Novogrodski for the Frank Garcia Design Team

This collection was perfect for layering and cutting out images to use as embellishments on my page.
The Memory Hardware by Frank is to die for! I used Prima leaves to add a pop of color in that beautiful russet color. 

You will find the supplies listed in the description section on my youtube video.


Here are a few close ups for you to enjoy!

Cartographer Layout by Lisa Novogrodski for the Frank Garcia Design Team
My background is Cartographer "Montgolfier"
I layered "Les Yeux" and "Merveilleux" 

My Splatters were created with Bloom Sprays in Tea Stain and Glistening Waves

My Splatters were created with Bloom Sprays in Tea Stain and Glistening Waves
Isn't that jewel gorgeous? Franks Memory Hardware collection... LOVE!

My Splatters were created with Bloom Sprays in Tea Stain and Glistening Waves

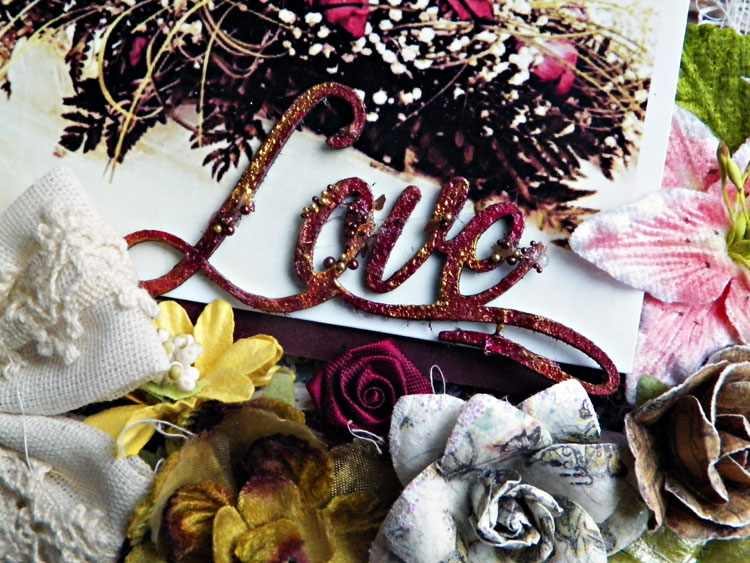
I embossed all the metal. I love the way it changes it and gives it an aged look.

My Splatters were created with Bloom Sprays in Tea Stain and Glistening Waves

That wraps up my project! Hope you enjoyed it and the video!

I'm your last stop so lucky me doesn't have post another name and link! **wink**


Saturday, May 9, 2015

Pocket Tag Tutorial - BoBunny

Hello Friends!

Last week I shared a Pocket Tag created as a teachers gift on the BoBunny Blog.
In case you missed it here is a look at the tag and the VIDEO TUTORIAL is here as well!

I used the Garden Journal collection on this one. A beautiful collection that inspired me to create a tag, using Rangers oversized tags and I created a pocket to hold an envelope with seed packets.  I'll include some garden gloves and little pots in a gift bag for my daughter's end of the year teachers gift!

You can find Garden Journal and all BoBunny products >>>> Here


I used a Ranger tag covered in Garden Journal papers! I also used the Flutter Die to create my butterfly.


The white tag was adored with the new BoBunny Gold Foil Rub Ons. These are a dream to work with.


Finally a little Kraft envelope containing some seed packets. My daughter can write a note to her teacher on the Post Card Journal piece.


Enjoy!

Thursday, March 5, 2015

Scraps of Elegance Mixed Media Scrapbook Page Tutorial

Hello Everyone! 

I'm sharing another project created for Scraps of Elegance featuring the beautiful February Kit "Lisas Love Letters"
You can find our website here and our facebook community here!

Today I have another mixed media scrapbook page with a video tutorial for you to enjoy! At least I hope you do. :)


Our kits are always filled with so many gorgeous elements! Beautiful papers and stunning florals! I've used mists in the background and splatters of course! Lots of cheesecloth on this page. I love the texture and dreamy quality it adds. 

Here is a peek at the video where you can see my process for putting this page together. More detailed close up shots of the page can be found below.


Close up shots. 


I used some micro beads on the chipboard. Love that stuff. This brand was one I had on hand from Heartfelt Creations. Gala Glitz it is called. It is hard to see in the video because I  need to improve my lighting but in the photos you can see the layers of color I add to my chipboard. I love the peeks of gold.


Here you can see the cheesecloth and the dreamy quality it adds.


Close up of leaves and florals. You can also see the subtle sheen the embossing adds to the chipboard.


In this photo you can really see the color and dimension the chipboard.


Thanks so much for stopping by! I hope you enjoy!

Wednesday, February 11, 2015

Mixed Media Portrait Painting Canvas Video Tutorial

Hi Everyone! 
This week I'm sharing a project I created with the Scraps of Elegance February Kit "Lisas Love Letters" creativity and color add ons.

In case you missed them this is what they look like. You can also find it here.


I used the canvas along with the mists, stencil and silks. I created a mixed media portrait painting. The face was started with one of Jamie Dougherty's Bloom Girl stencils. This one is "Sharon." I just used the outline of her face and some of her features then made it my own.

At the moment I'm not into drawing hair. I think we all question our journey and style when we are taking drawing classes as you tend to pick up the instructors style and think you don't have one of your own. As I am developing my own- no hair seems to be the common theme for me. I enjoy using other elements for hair rather than the traditional flowing locks. LOL

A few close ups of her and you can see the video below!


Take of tour of my process video right here!
I hope you enjoy!


Sunday, February 1, 2015

Mini Album and Video Tutorial

Hey All! 
Today I am sharing a mini album I created from scratch with the January Scraps of Elegance Kit "Reneas Charm"

You can find our Scraps of Elegance kits right here.
You won't want to miss one. 
Each is filled to the brim with gorgeous products!

Not only did I create a mini album but I also did a video tutorial showing how I put this together.
I hope you enjoy!

create your own mini album tutorial by Lisa Novogrodski for Scraps of Elegance using the January Kit Reneas Charm
I used a gorgeous selection of Fabscraps papers and flowers in the kit for the cover.


create your own mini album tutorial by Lisa Novogrodski for Scraps of Elegance using the January Kit Reneas Charm
A little close up the shabby chic florals on the binding.
create your own mini album tutorial by Lisa Novogrodski for Scraps of Elegance using the January Kit Reneas Charm
Here is a side view of the pages opened.

Take a peek at the video above to see this book and all it's pages!

Thursday, January 15, 2015

Altered Treasure Box - Video Tutorial

Good Morning Friends! 

 Today I am sharing a project created with the January "Reneas Charm" kit from Scraps of Elegance.

This kit is packed full of gorgeous shabby chic papers and embellishments. We also have a beautiful creativity add on featuring "Mix the Media" receipt holder. I used this piece to highlight my project. 

Let's take a peek at the project and video!


You can see my step by step process in the video listing supplies and techniques!


Thanks for stopping in today! Don't forget to swing by Scraps of Elegance to grab a kit and visit our facebook community!

Monday, December 29, 2014

Mini Album Video Tutorial

Hi Everyone! 
Today I am sharing a mini album I created with the November Scraps of Darkness Kit "Serenade"


This kit was so beautiful and contained so many gorgeous ingredients I thought a mini album would be perfect to showcase it.


I wanted to give you a little tutorial on how I put this together so you can check out the video too!


... And a peek at the pages...

I stitched around each page...

Tucked in a couple of vellum pages to make this extra special...


I show you my chipboard techniques in the video!


I love little pockets and tags...


Little embellishments from the BoBunny Noteworthy pack made this all come together!


Thanks for stopping by!

Saturday, August 30, 2014

Video Tutorial Accordion Fold Tag Pocket Mini Album

Hello Friends! 
Today I want to share my video with you in case you missed it on the BoBunny Blog last week!

Here a few photo shots of this project.

This is a cute mini album that was a ton of fun to create. Lots of little pockets to hold tags, photos, tickets, etc.

 I used some mixed media techniques as well as punching to make this album my own. 
Check out the video and let me know if you make one for yourself. I would love to see it! 


Tuesday, May 27, 2014

BoBunny Freestyle Layout

Today I am sharing a project I created for BoBunny "Freestyle"
This basically means I can do whatever I want! LOL
I created a layout featuring the "Pincushion" collection. I just love the peach and green together. I used some of BoBunny's Blossoms in darker tones to bring in some contrast. I also created a video tutorial of how I put together this project. You can find that just below.


I really love the printed background on this paper. I used some of Lindy's mists to add some background color. The edges and doilies are all inked with Distress Ink.


Here I used CottageCutz Leafy Foliage Die. One of my favorites for leaves!


This beautiful photo is courtesy of photobucket. I added stitching, modeling paste and washi tape to make it even more vintage, distressed and interesting.


Little bits of punching here and there.

I created the cluster in the corner to mimic the florals in the photo. Loved working with this collection and these colors!

BoBunny Supplies:

Pattern Paper: Sew Fun, Patchwork, Handmade, Polka Dot Pattern, Seamstress/ Pincushion
Cardstock:  Decaf Vintage, Coral Vintage/ Double Dot
Blossoms: Wildberry Pansy, Clover Pansy
Buttons: Pincushion
Doilies: Small
Brads: Baby Bump
12 x 12 Chipboard: Pincushion
Washi Tape: Black and White

Friday, May 23, 2014

BoBunny Pinterest Inspiration with Video Tutorial

Hello Friends! 
Today I am sharing a project created for BoBunny inspired by this beautiful board!


I have a video tutorial to share with you showing you how I put this project together!


I pulled the colors from the Pinterest board to create this page. I really fell in love with the pinks, peaches and teal tones.  I was inspired by the roses and the stacking of the cake and built my project from there adding layers of stamping, paint splatters and drips among my papers.


I stacked my layers and used doilies to tie into the "cake" in the photo. I also loved the giant rosettes in the pinterest photo and created my own for this page.


You can see I used a lot of roses and they were cut from the Primrose paper collection.


I wanted this page to have a lot of movement so I added string and drips to lend that feel to it.


Supplies:
BoBunny: Happy Tails, Pop Quiz- Bookworm, Modern Miss- Fascinating, Dramatic, Primrose- Breathtaking, Double Dot- Dark Denim Vintage
12 x 12 Chipboard- Primrose
Noteworthy- The Avenues
Doilies- Medium
Stamps- Distress Texture
Lindys- Bayou Boogie Gold, Chesire Cat Cherry
Prima Ink- Rusty Bucket
Distress Ink- Vintage Photo

 
© Living in Color