AND MORE LAYOUTS WITH THE DECEMBER WINTERS EVE KIT!!!
Check out the Bo Bunny Blog today! Scraps of Darkness and the work the designers have done with their Enchanted line is being featured!!! Woot Woot!!!
I have been on a mojo roll these last few days and have a couple of new layouts to share using the GORGEOUS Enchanted papers from our Winters Eve kit.
Always
I used a piece of Clear Scraps XL deco shape that I had in my stash as a backdrop. I took one of my Prima Masks and the Lindys Black Orchid mist we received in our Color Add On. I covered the background with the misting. I also colored my Prima mistable canvas pieces in the Black Orichid. It looks gorgeous in real life. So shimmery and a silvery grey. This time I fussy cut those papers. They
were begging me to.

 I inked the edges of all the cut pieces in black ink. I dissected Mandy's pin. You know you don't have to use things in the kit as they are. I decided to pull the pin apart. (Sorry Mandy) and I used the netting and the beads in different spots around the layout. I used the cap of the pin for the top of the cut out dress form shape. This photo of my husband and I was taken over this past summer. (Photography credit: Gina Coppollino)
Angelic
I am starting to get into using images for my artwork. Sometimes I have a vision in my head and I need something other than real life photos to play it out. I purchased this one through High Tea Design Etsy
and I love it.

I wanted to go soft and heavenly with the Bo Bunny Paper mixed with the Creative Imagination. I used a tattered rose distress ink around the edges and on the Basic Gray Little Black dress lace stickers.
I also used a subtle Lindys mist on the Kaisercraft gate.
 I sewed around the photo and also distressed the edges with my zutter. Then I inked them in the tattered rose.
Thank you for taking the time to stop by. I appreciate your visiting me and leaving such nice comments.
Happy Holiday week!
Check out the Bo Bunny Blog today! Scraps of Darkness and the work the designers have done with their Enchanted line is being featured!!! Woot Woot!!!
I have been on a mojo roll these last few days and have a couple of new layouts to share using the GORGEOUS Enchanted papers from our Winters Eve kit.
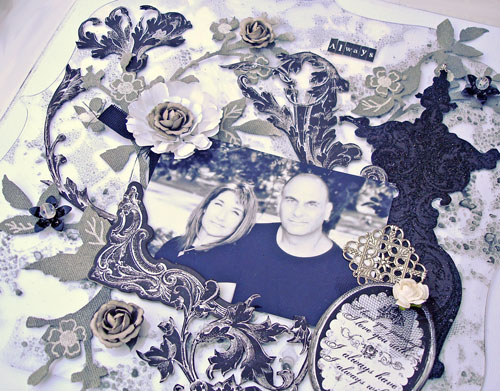
Always
I used a piece of Clear Scraps XL deco shape that I had in my stash as a backdrop. I took one of my Prima Masks and the Lindys Black Orchid mist we received in our Color Add On. I covered the background with the misting. I also colored my Prima mistable canvas pieces in the Black Orichid. It looks gorgeous in real life. So shimmery and a silvery grey. This time I fussy cut those papers. They
were begging me to.

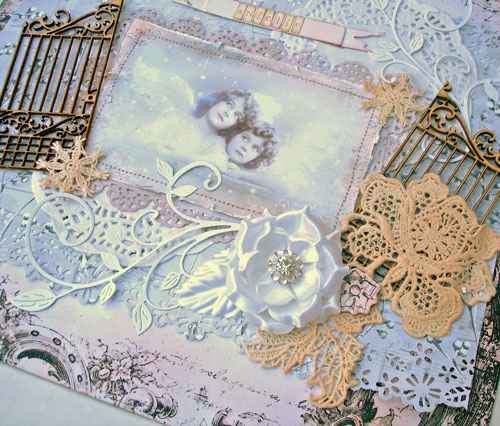
Angelic
I am starting to get into using images for my artwork. Sometimes I have a vision in my head and I need something other than real life photos to play it out. I purchased this one through High Tea Design Etsy
and I love it.

I wanted to go soft and heavenly with the Bo Bunny Paper mixed with the Creative Imagination. I used a tattered rose distress ink around the edges and on the Basic Gray Little Black dress lace stickers.
I also used a subtle Lindys mist on the Kaisercraft gate.
Thank you for taking the time to stop by. I appreciate your visiting me and leaving such nice comments.
Happy Holiday week!