Wednesday, May 20, 2015

BoBunny- Mixed Media Burlap Canvas Cards

Hey Gang! Just popping in today for a quick post.
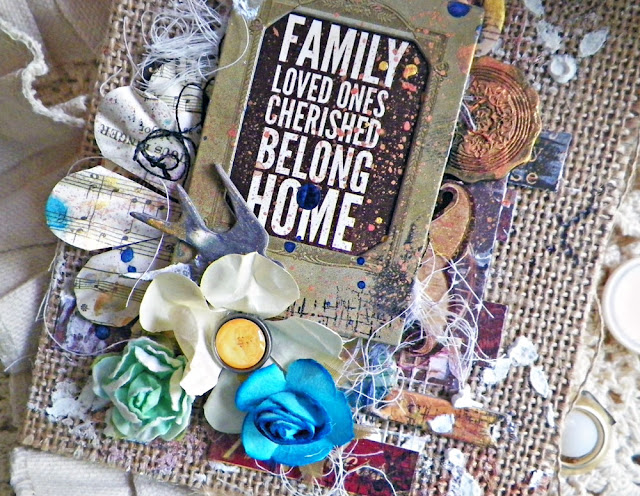
Up today I have two burlap cards that were lots of fun to create with BoBunny's Heritage collection.

I love this collection so much! Have you seen it? You can find BoBunny's collections right >>>>>> here.


Mixed Media Card by Lisa Novogrodski using BoBunny Heritage

I layered the Heritage papers in the background although most of them ended up covered! LOL
I then layered stamps, stencils florals and layered chipboard.


I love the versatility of BoBunny designs. You can make this collection quite elegant if you choose or go in a mixed media direction.


Mixed Media Card by Lisa Novogrodski using BoBunny Heritage

I thought I would add a whimsical touch to this card. I used one of the wood kraft glasses to the clock!


BoBunny has glimmer sprays and I just LOVE them. I mixed them in with my pearlescents to paint the background and so some splattering.

You can find the glimmer sprays >>>>>> here
and the pearlescents >>>>>>>> here


Thanks for stopping by! Have a great week!

Tuesday, December 9, 2014

BoBunny Stocking Cards

Hi Everyone!

 Today I'm sharing cards created with BoBunny's Christmas Collage Collection. I love working with this collection and really enjoyed created some cute cards for holidays. I'm on the BoBunny Blog today with two mitten shaped cards that I LOVE and you can find them here.

We are doing a swap with Leaky Shed and all my projects today contain their beautiful chipboard pieces.


I painted the chipboard with Lumiere Paint then randomly embossed it in gold.


I used a mix of ribbon and added a gold bell. I also added a small clear snowflake and used BoBunny glitter paste on the snowflake, edges of the card and the little Santa chipboard piece. I created that by adding a film sticker to an older piece of BoBunny Chipboard.


I used the same approach for the chipboard on my Winter Wonderland Card. I used a green paint on it and then embossed in gold.


I used a machine zig zag stitch and I ran it up and down on the lines of the pattern of the stocking.


More BoBunny Glitter Paste.


BoBunny Supplies: 

Tuesday, October 28, 2014

BoBunny Christmas Collage Cards


Hi Everyone! Just stopping in to share a couple of cards I made for BoBunny featuring the Christmas Collage collection. 


I love the beautiful vintage feel to this collection. I cut out the Santa and girl and embellished with holly crown with jewels and glitter paste. You can find them here and here.


I've added some shabby details to this card using BoBunny doilies and shredded cheesecloth.


This die cut was misted with the bronze glimmer spray.


This fun card was created with the Christmas Collage papers and chipboard.


I love this chipboard ruler tree!

Thanks for stopping in today!Have a great week!

Friday, September 26, 2014

BoBunny Madeleine Cards

Hello Crafty Friends! 
I'm just popping in to share a couple of cards I created using BoBunny's Madeleine Collection. Have you seen this collection yet? A beautiful mix of deep burgundy, pink, gray, green and gold...birds, cages and frames...
Delightfully beautiful and oh so shabby!

You can find it here


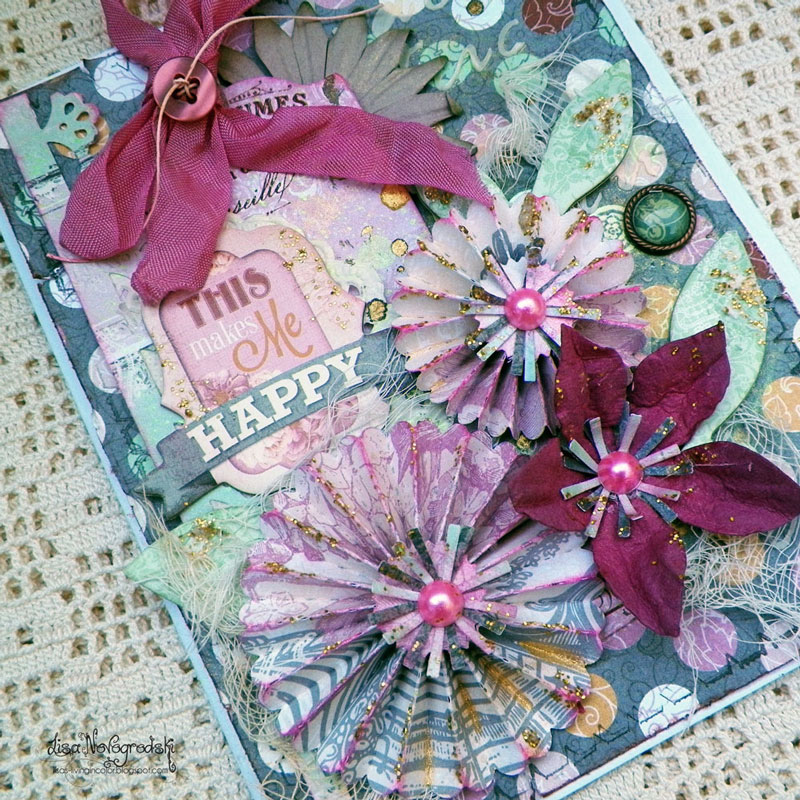
This_Makes_Me_Happy_Card_Lisa_Novogrodski_Bo_Bunny_Madeleine_01

This cards was created with the beautiful "Symmetrey" paper for the background.
I used my Tim Holtz die to create the Rosette Flowers on this card.

This_Makes_Me_Happy_Card_Lisa_Novogrodski_RainingsArtfulLife_BoBunny_Madeleine.02

BoBunny now has beautiful Mixed Media products! Stencils and Glitter Paste!
I used the Brocade stencil on the "This Makes Me Happy" card.

And Glitter Paste in Gold on both cards.

Hi_Friend_Card_Lisa_Novogrodski_BoBunny_Madeleine_02

This card features stamping with the new "Stitches" stamp by BoBunny.
I've got a few stamps that are my faves and this is one for sure!


Hi_Friend_Card_Lisa_Novogrodski_RainingsArtfulLife_BoBunny_Madeleine_02

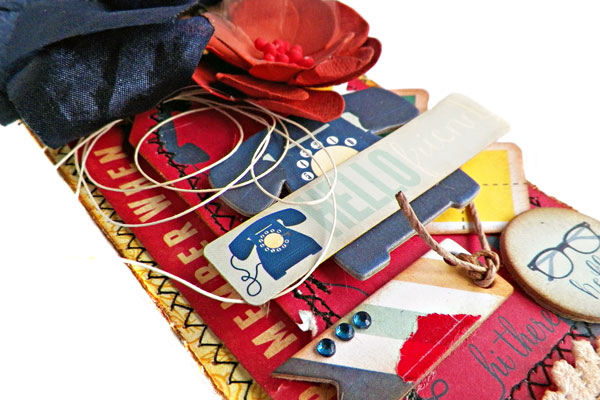
I've also used the "Sentiments" stamp to create my "hi friend' tag. I stamped it on vellum then placed it over a pattern paper die cut.

What are you creating with the Madeleine collection? I would love to hear about it!

Saturday, July 19, 2014

BoBunny Lemonade Stand


I had a great time this month creating cards with the beautiful "Lemonade Stand" collection! How can you not love the fun bright summer colors and fresh squeezed designs? You won't soon forget the lime greens, lemon yellows and peony pinks in this collection.
Along with those glorious colors are tones of reddish orange. Another big fave of mine.

 Take a peek at what I did with it!


I used "Squeeze Me" as my card base and embossed a plain white piece of cardstock die cut with a Spellbinders Die. I splattered mists (Lindys) on the embossed piece and then ran some chalk ink along the edges.


 My butterflies are a Cheery Lynn Die and I used the same "Squeeze Me" paper for the top butterflies. Then bottom ones were die cut with "Daydream." 


I actually did a lot of die cutting for these cards. I seem to have gotten out of using my dies and now "I'm back baby" on a die cutting binge. More Spellbinders dies were used under the butterflies with lime green side of "Squeeze Me."
I achieved texture and softness by tearing up cheesecloth and placing it beneath the title and butterflies.

 This card is a favorite of mine too. I love the color combo. I have always loved blue and orange together. It is just a stunner! Here I used another Spellbinders Die for the card base and did some mixed media work with modeling paste and sprays.


 The edges were stamped with the new BoBunny Stamps "Stitches" and my flowers and leaves are Heartfelt Creations.


I tucked in some twine and misted cheesecloth along with BoBunny wooden embellishments "Kraft Wood Shapes Elegant."

You know you don't want to miss what my other design team sisters have done with this collection. Stop by the BoBunny Blog for more inspiration!

Tuesday, April 29, 2014

BoBunny Mix and Match Cards


Easel Card Box
Mix and Match

Hi Everyone! Today I am sharing an easel card box created by mixing a variety of collections (you can see my supplies listed below)

I created this box by following "gettinginspired" easel drawer card tutorial on youtube. You can find that here.

If you enjoy creating special cards and gifts for friends and family then this one is sure to impress them! Who wouldn't love getting a card like this to treasure.


I used a grungy collage look for this project. I layered the Lil' Monster paper and the Modern Miss embellishments. Distress punching, lots of inking and and burlap thrown in for good measure.


This cute little drawer can hold a gift. I used one of the Silver and Gold brads for a drawer pull. 


Here is what the card looks like opened with the easel part not folded over. I used paint dabbers and distress stains on the gears.


Here is a peek at the back of the card. I've been loving tearing up some book pages lately and adding them as another layer of texture to my projects.


BoBunny Supplies:

Pattern Paper: Mischief/ Our Lil' Monster,  Miss Selfie, Fascinating/ Modern Miss, Class Clown/Pop Quiz
Noteworthy: The Avenues
Cardstock: Licorice Flourish
12 x 12 Chipboard: Modern Miss
Combo Sticker: Modern Miss
Cardstock Stickers: Our Lil' Monster, Head Over Heels
Kraft: Wood Gears, Burlap Ribbon
Brads: Silver and Gold
******************************************

Next up is a tag I created with another mix it up combo of Modern Miss, Our Lil' Monster and Pop Quiz.
All the colors from these collections work so beautifully together.

A girl can never have too many layers - at least not this girl.


I loved the "Hello and Hi There" sentiments and went with that for my theme. This would make a cute topping to a package or work in a mini album as a special embellishment. You could even adhere a photo to the back. I always finish off the backs of my tags.

How fun is that? Love the alphabet graphics on her and I added lots of washi tape to grunge it up!

Thanks for stopping in today. I hope you all have a great week!

BoBunny Supplies

Pattern Paper: Class Clown/PopQuiz
Noteworthy: Modern Miss, Our Lil' Monster
12 x 12 Chipboard: Modern Miss
Washi Tape; Modern Miss
Blossoms: Wildberry Pansy
Jewels: Modern Miss


Thursday, March 20, 2014

"Enjoy" Card- Scraps of Darkness


Hi Everyone! Today is quick post sharing a card I created with the February Scraps of Darkness Kit "Touch of Grey"

You can find the kit with all the add on's here

I love the earthy elegant feel to this kit. I've gone a little vintage month and have really put my distress inks to work. Here I used the "honey" shade. It is one of my faves! I of course did some punching with a little MS punch around the edges.

I've layered a lot of elements which is really my favorite thing to do. I love to just keep on layering and playing with the design. You wouldn't believe how many times I move things around and how long it can take to create a card. I might even start with a sketch for inspiration or another designers card but that just gets me going!


Ginas Designs has these beautiful laser cut doilies and I absolutely love to use them whenever I can. This one I inked for a vintage look and layered some chipboard leaves over it. 

I used a Heartfelt Creations stamp in the background and on the leaves that has a script to it. The little pocket and tiny tag were in previous SOD kits. I just added that cute paper clip.

Hope you all have a great weekend! Thanks for stopping in!

Tuesday, February 11, 2014

BoBunny "Head Over Heels"

Hi Everyone! 
Today I am sharing two cards I created with the beautiful "Head Over Heels"Collection from BoBunny!

This collection is perfect for Valentines Day, Anniversaries or just to send someone you love a special card or note!
I'm a big fan of hearts. I love them and have a collection of different hearts in my home so this theme is special to me.
I used multi layers on my card with a die cut from Spellbinders. I added in a book page to give this a little vintage touch. I love the layered chipboard and cute heart button!


I die cut a little tag for the 
"Be Mine" sticker and added some pink scrunched seam binding!


My next card features that beautiful floral chipboard flourish from the 12 x 12 chipboard. I cut it apart so I could place it on the card to my liking.
I added the Silver and Gold Serenity Jewels to the hearts.


And finished off with a twill bow.


Pattern Paper: Head Over Heels, Date Night, Day Dreamer,  Endless Love,  First Kiss
Cardstock: Double Dot ,Passion Fruit Stripe, Wild Berry Stripe
Chipboard: 12 x 12 Head Over Heels
Noteworthy: Head Over Heels
Layered Chipboard: Head Over Heels
Buttons: Head Over Heels
Cardstock Stickers: Head Over Heels
Combo Stickers: Head Over Heels
Jewels: Silver and Gold Serenity


Monday, December 30, 2013

2013 favorites review

Hey Everyone! I am wishing you ALL A VERY HAPPY NEW YEAR TO COME!
May 2014 be filled with artful creative ventures for you all! I cannot wait to see what everyone does in the coming year! Thank you for your support through the year, visiting my little blog space and leaving me your encouraging comments. I appreciate each and every one of you!

I am venturing into some new territory myself. Drawing, painting, art journaling and more mixed media. Taking a few months off from kit club scrapping to learn, grow and evolve.

So without further ado here is a wrap up of my favorite projects for the year 2013...


© Living in Color